This tutorial is to tell you how to convert DAT file to Flash in few easy steps, so as to share it with others online.
How to convert your DAT to Flash?
Have lots of .dat files? Want to convert DAT to Flash? If that so, the below tutorial will tell you how to make it. In few steps, you will make Flash from your DAT.
1) Download Flash Video MX Std and import the DAT.
First, download the software Flash Video MX and run it. Import the DAT file from your computer; soon you will see the program's main interface below.
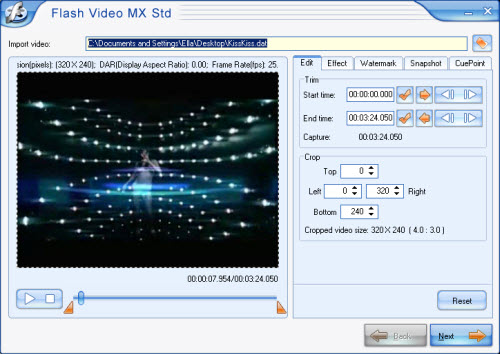
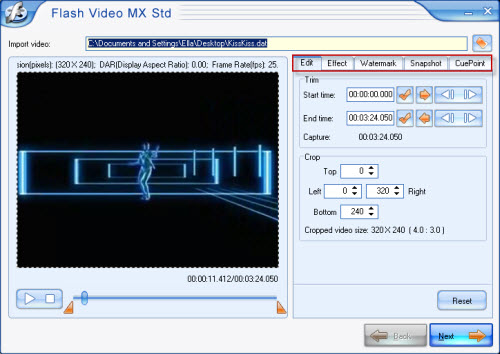
2) Edit the original DAT
Then you can begin your conversion, this will just need few clicks. In the first interface, you can edit video, adjust effect, add watermark, capture snapshot, and insert cuepoint. All of them are waiting for you to choose when you need them. The details are under the buttons which red marked below. With them, you can get the video clips with proper length as you like, including the personalized logo, the picture which you want to get as your Flash's first frame etc.
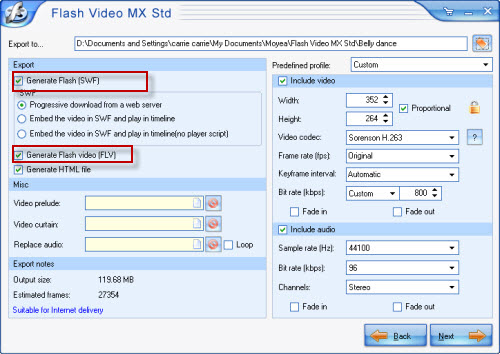
3) Setting
Click Next button, you will come to the below interface. Here, do not forget to check the options "Generate Flash (SWF)" and "Generate Flash Video (FLV)", which will convert your DAT file to Flash (SWF) and Flash Video (FLV). Moreover, if you like, you can add other videos in the beginning or end of your original file, as well as replacing the audio. At the same time, there are other parameters you can set to meet your special needs. If you want to get the better video quality, the higher bite rate and sample rate is recommended.
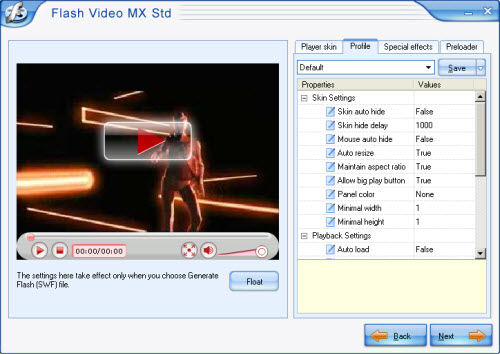
4) Customize Video
In this step, you can customize your video with various player skins, special effects and preloader formats. The program allows you to choose various player skins under the sections like Classic, Opaque, Translucent and Transparent.
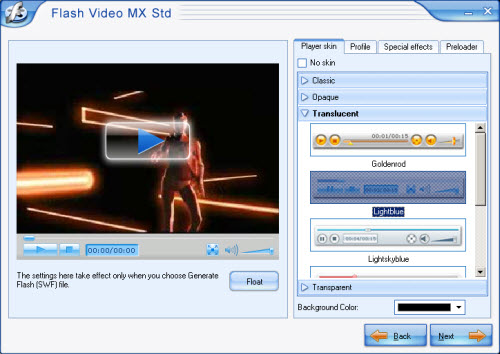
Besides, do not forget to customize the player bar under the section Profile if you need it.
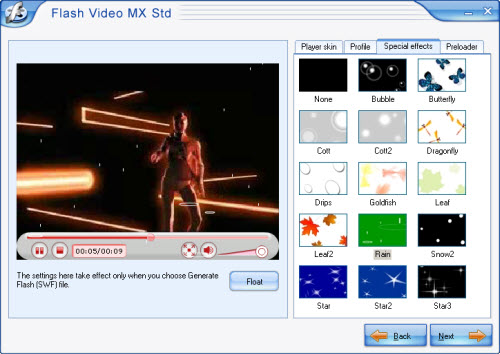
Apart from that, you can insert the special effects and preloader format to your video. Just like below, Rain is selected, so you can see the original video is different now.
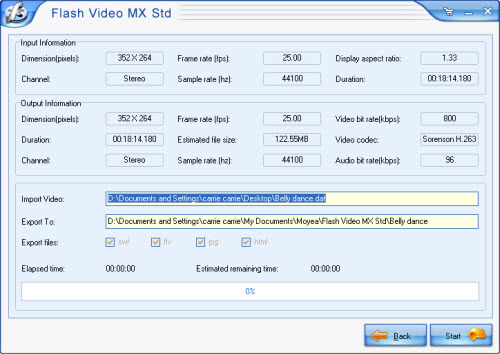
5) Conversion
The last step is conversion. In this interface, you can check all the info from the Input information and Output information. If you find something wrong, you can click the button Back to reset it. If right, just click the Start, the conversion will begin at once.
After the conversion is finished, a pop-up window will appear to tell you how to get the Flash and FLV. Then you can upload it to the website or blog to share with everyone you like. Just enjoy them.