Want to make flash from your DVD? Feel excited if you can upload your DVD contents to your own websites or any other formats? If that so, this tutorial is just right for you. It will tell you how to make flash movie, FLV from your DVD file.
First, download the DVD to Flash Converter, then start this program, you will see the below interface, which is the main interface of DVD to Video Converter.
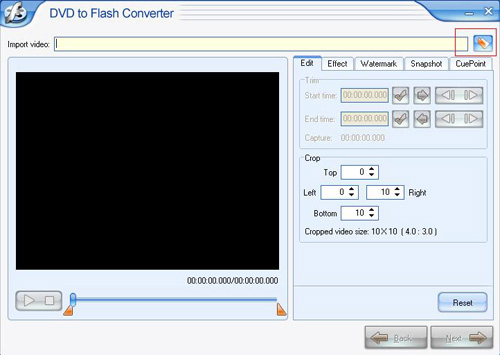
1) Import DVD file.
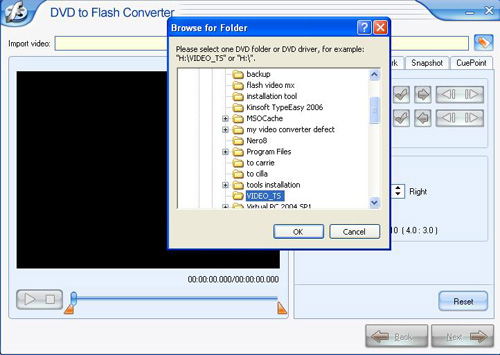
Click the button red marked in the above main interface, and then you can choose to import the DVD file. Just see the below, check the DVD file folder which you want to convert, click button OK, the DVD will load to the program successfully.
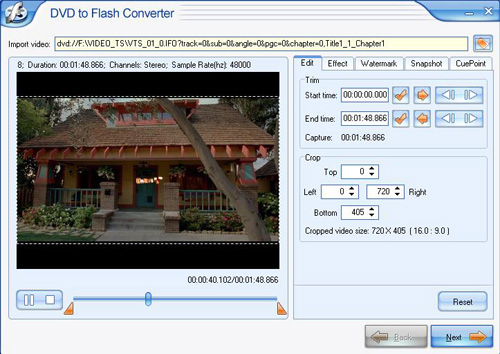
2) Customize your original DVD file.
In this step, you can customize your original DVD file. Under the section Edit, this program allows you to trim and crop the DVD, so that you can choose the proper length and area to meet your special needs. With the Effect section, you can adjust the video brightness and contrast, audio volume. What's more, you can add logo and subtitle under the section Watermark. Besides, Snapshot section is used to capture the picture to be used as the first frame, while CuePoint section is designed for you to insert the cue point to your output FLV file.
3) Do the setting.
In the below interface, you can set the file export place, bit rate, sample rate; choose video codec and size; add video in the beginning or end of the original program; replace the original audio with other ones, and so on.

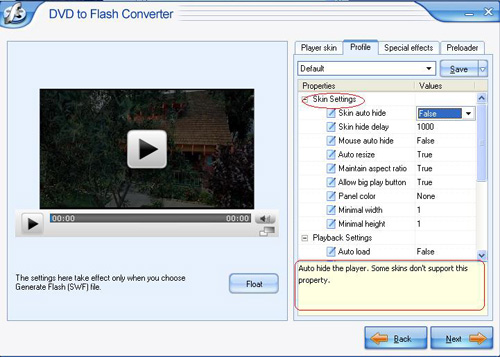
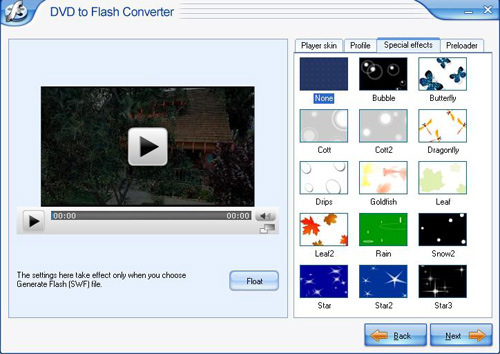
4) Flash player skin and special effect.
In the following interface, you can choose your favorite Flash player skins, set the player profile, insert the special effects and add the preloader form as you like.
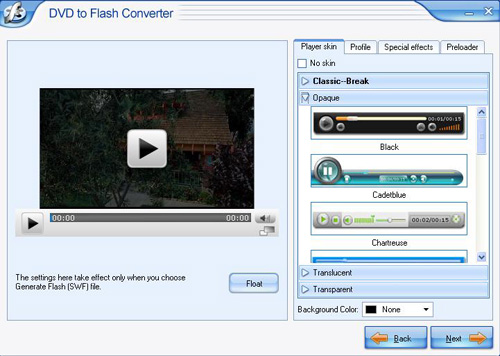
Especially in the section profile, you can check the options below to enjoy a stunning player.
The special effects allow you to insert them into your DVD, which will make it special.
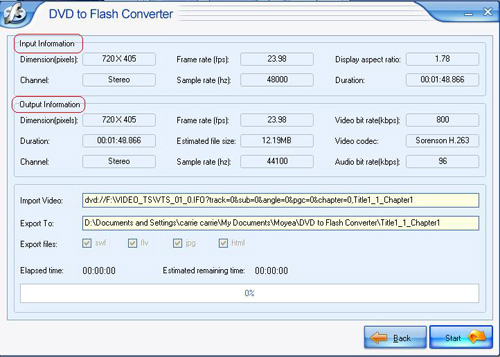
5) Conversion
The last step is the conversion. Just click the Next to go to the below interface, where you can click Start to begin your conversion. At the same time, you can review the parameters here. If you find something wrong, you can press Back to reset.
In no time, you will get the Flash files though the pop up window when the conversion is finished.
6) Upload the generated Flash movie.
After you finished the conversion, you will get four files, including (FLV file, HTML file, SWF file, and JPG); you can put the generated files in a folder and upload to your website.
That is to say, you can created a folder which you can put the generated four files (including FLV file, HTML file, SWF file, and JPG) into your website. If you name the folder as "one ", then you can upload the Flash movie ((this is the SWF format of your video converted by DVD to Video Converter)) to your website by FTP or any other uploading tools.
Soon you will see http://yourserveraddress/one/x.html, "one " is the generated file's name and the x.html is the generated html file, x.html is the generated webpage by DVD to Video Converter, you can see the SWF files(this is the SWF format of your video converted by DVD to Video Converter) in the webpage.