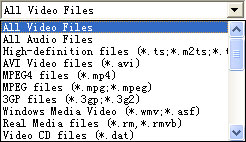
Did you save your vacation movies of diving or sailing in the summer? If you missed it, do not forget to record the memorable thanksgiving holiday with your family and friends. You can shoot video with your camcorder, digital camera, cell phone, or even iPhone. Don't waste the video. Bring your high-definition video to video contest, or just share with friends and family on your site, blog. After transferring video to computer, Moyea Flash Video MX Pro works for your HD video conversion and player editing. The HD video formats supported by Flash Video MX Pro 6 are *.mod, *.tod, *.mts, *ts, *.m2ts, *.m2t, *.tp, *.trp, *.dv, *.mkv.
MOD is the format used by JVC, Panasonic, and Canon, while TOD is used by JVC. MOD is used for standard definition video, while TOD for high definition video. AVCHD camcorder provides high definition videos. The file extension for AVCHD video could be *.mts, *.ts, and *.m2ts.
Here are the steps of loading HD video directly to Flash Video MX Pro with quick player editing.
Step 1. Import Video/DVD
When you run Flash Video MX Pro 6, you will face the interface with 4 options. Here we take Flash Video MX Wizard as an example.
Click the open button and the video files from camcorders like JVC are recognized by Flash Video MX Pro.
You can import video files from camcorders like JVC GZ-MG630, GZ-HD30, Panasonic SDR-S26, Canon FS21, Canon HF S11, and so on. For the full list of supported file formats, consult the format list.
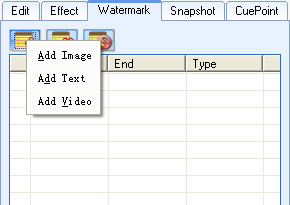
Step 2. Edit video (optional)
Click the Watermark tab to add logo or text watermark to video. Time offset is available for each watermark. It is easy for you to display different watermark on particular duration.
Click the Next button and choose encoding profile for your preferences with estimated output file size.
Step 3. Edit player skin with image and hyperlink
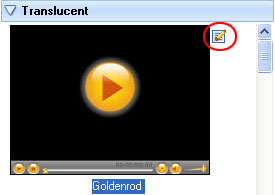
Click the Next button and you can select one of the player skin you like. Just click the edit button on the right of the player under Player skin tab. You will then face the new interface with the selected player on the edit panel.
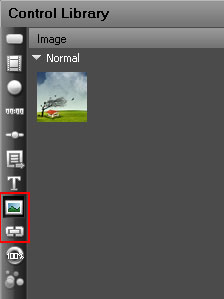
If you want to edit the player skin with your image or logo, click the Image group under Control Library and click on the sample image, keep pressing the mouse and drag to the edit panel with the position you want the image to show on player. Resize the image as you like. Then click the browse button under the Advanced tab in the properties window to load your image or logo.
Want to add hyperlink? Find the Hyperlink group under the Image group, drag and drop the sample link to edit panel like the image. Then you can change the caption, URL, text color for the hyperlink. You can also add hyperlink to the image area with empty character string as caption to make the image with hyperlink. It is up to you and depends on your imagination.
When all is done for player editing, click Save and Return button and the player skin is automatically selected under the Custom category.
Note: The image or hyperlink will display on player without time offset.
Step 4. Export files
After choosing a player skin, click the Next button and click the Start button to start conversion. The files like .swf, .flv, .html will be exported to the same folder.
Step 5. Upload files
If you are going to upload the files without changing the location of the .swf, .flv, .html files, just copy the code between the Object tag to your web page file.
If you would like to move the .flv file to another folder, for example, the flv file is output.flv and a new folder named video is created in the output folder, you can change the video file path. This function only works with the player exported by the registered version of Flash Video MX Pro. In such case, the relative file path is video/output.flv. Add ?videoFile=video/output.flv after the .swf. You can also refer to supported Flash variables of the registered version.
Flash Video MX Pro 6 is the choice program for you to amaze your visitors with digital memories and custom player.
2009-11-19