This article will tell you how to make a video resume and upload it on your personal website, Blog or YouTube etc.
Things we need:
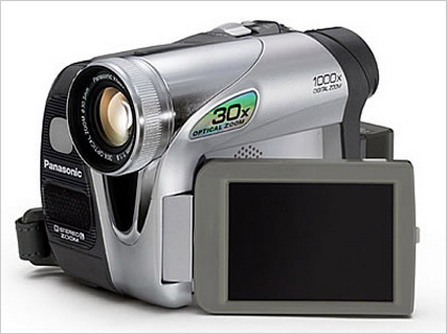
1. If you have a DV, you can use it to record the self introduction.
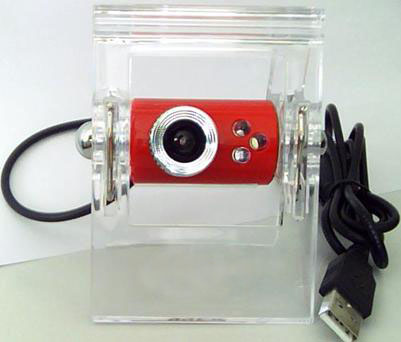
2. If you do not have DV, you had better have a computer with a camera or buy a PC camera to recode the self introduction.
3. Windows Movie Maker, which can help you to capture video from the video devices.
4. Moyea Flash Video MX Pro. This software can help you to convert regular video to FLV format and generate a paragraph code that you can use in your page directly.
Steps of making video resume:
Step1. Use your DV to recode some scenes for further edit.
You can use it to recode a self introduction or some clips which can show your personality. I don’t know, you can use your own imagination.
Or you can use a PC camera to do the same thing.
In this step, what we want is to collect video sources for the further edit. And if you use the PC camera, you can save the video as AVI format directly.
Step2. Use Windows Movie Maker to capture your recoded video and save them on your computer as WMV or AVI format.
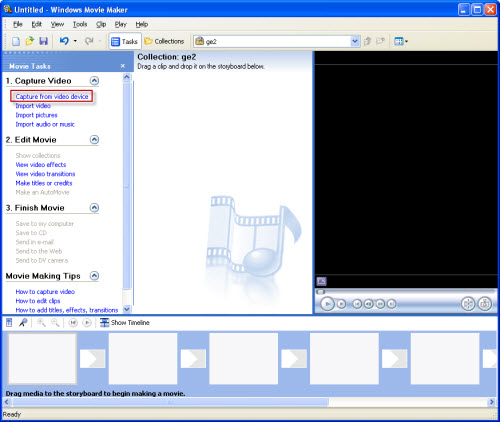
Movie Maker is a good free software, you can use it to capture video and audio to your computer. But To begin capturing, a video capture device must be connected properly and detected on your computer by Windows Movie Maker. More details please refer to Movie Maker’s help document.
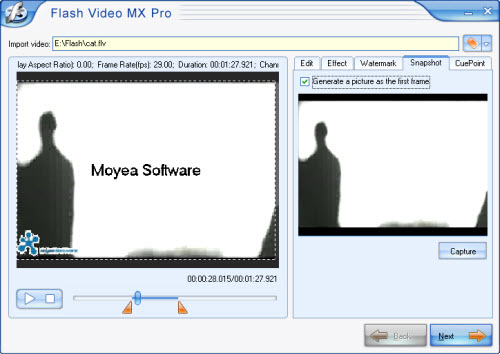
Step3. Use Flash Video MX to convert the saved video to FLV format and edit them.
The conversion function is the basic function of this software. You can learn how to use it from this page.
Here let’s talk something about the edit function:
1. General settings
If you'd like to edit your video, you can fix it under the tabs on the right. You can trim and crop under "Edit"; change the brightness and contrast under "Effect"; add text or image watermark under "Watermark"; capture a thumbnail under "Snapshot", and so on.
Then, click "Next".
2. Output settings
In this section, you can choose the output folder and output formats. Here we choose "Generate Flash video (FLV)", "Embed the video in SWF and play in timeline", and "Generate HTML file".
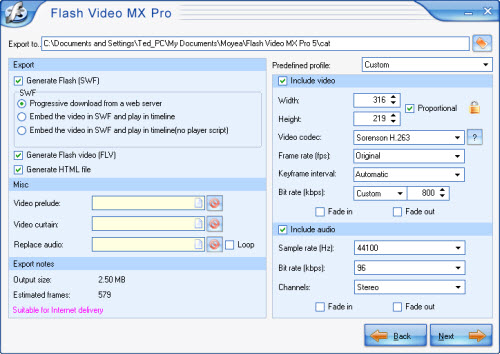
You can also merge two other videos with this one by adding video prelude and video curtain. If you want a better quality, you'd better keep the parameters on the right original. Click "Next" to continue.
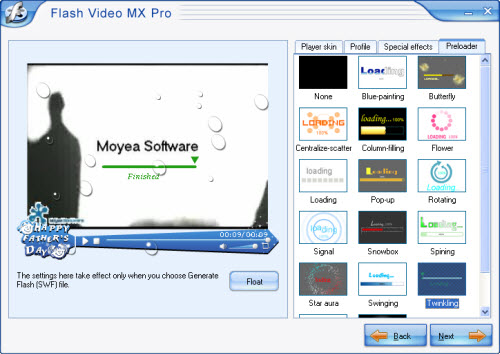
3. Player settings
In this section you can add player skin, some special effects, and preloader. You can also set more parameters under "Profile" tab, such as auto play, auto load, navigation, etc.
Step4. Embed your video resume into the webpage.
Open your .html file with notepad, you can see this code:
<!--url's used in the movie-->
<!--text used in the movie-->
<!-- saved from url=(0013)about:internet -->
<object classid="clsid:D27CDB6E-AE6D-11cf-96B8-444553540000" codebase="http://download.macromedia.com/pub/shockwave/cabs/flash/swflash.cab#version=8,0,0,0"
width="320" height="270">
<param name="movie" value="aaa.swf ">
<param name="quality" value="high">
<param name="allowScriptAccess" value="sameDomain" />
<param name="allowFullScreen" value="True" />
<embedsrc="aaa.swf?videoFile=christmas_1.flv"quality="high"
pluginspage="http://www.macromedia.com/go/getflashplayer"
type="application/x-shockwave-flash" width="320" height="270" allowScriptAccess="sameDomain" allowFullScreen="True">
</embed>
</object>
Find this line: <param name="movie" value="aaa.swf">
“aaa.swf” refers to your player’s name.
Add “?videoFile=%s”, %s refers to the .flv file’s absolute path (support http and rtmp)
For example:
<param name="movie" value="aaa.swf?videoFile=http://www.moyea.com/flv/flvdownload_demo.flv">
The above only support IE, if you want it to support FireFox, please follow this:
Modify <embed src="aaa.swf?"...
to:
<embed src="aaa.swf?videoFile=http://www.moyea.com/flv/flvdownload_demo.flv"...
At last, you can enjoy your video on your own website.
You can see the effect with this link: http://www.video-to-flash.com/demo/
2009-6-12