What is RMVB?
Real Media Variable Bit rate (RMVB) is a variable bitrate extension of the RealMedia multimedia container format developed by RealNetworks.
As opposed to the more common RealMedia container, which holds streaming media encoded at a constant bit rate, RMVB is typically used for multimedia content stored locally. Files using this format have the file extension ".rmvb".
Allegedly, Real Media formats typically achieve much more efficient compression than MPEG-4 Part 2 codecs, such as DivX and Xvid[citation needed], using compression similar to MPEG-4 Part 10 codecs[1], such as x264. For this reason, they have become noticeably present (though not entirely popular) on file sharing platforms such as BitTorrent, eDonkey and Gnutella. Limited support is available on some media players, generally on the Windows platform, including the proprietary RealPlayer 10 and the open-sourced Media Player Classic, using an appropriate DirectShow filter or Real Alternative. MPlayer and some other programs such as totem are able to play RMVB files in Linux/UNIX-based x86 machines through the use of WIN32 DLLs or native closed-source libraries.
How to Convert RMVB to Flash?
RMVB files are great for online downloads, but they aren't widely compatible with all available media players. Below I provide one conversion option, with a link to software that gracefully handles the easy route and step-by-step instructions for converting RMVB files using Flash video MX Pro.
It is easy, just read the few steps below:
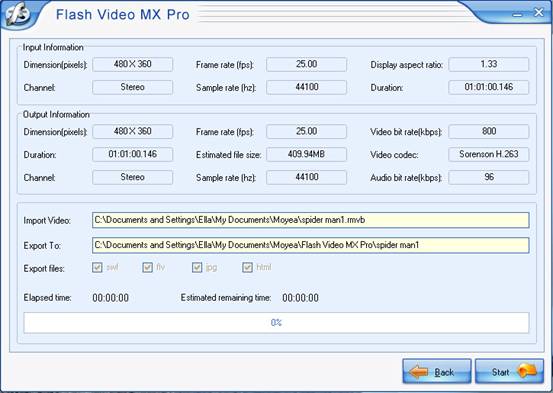
Step1. Run the Flash Video MX Pro and import the video you want to convert.
Moyea Flash Video MX Pro can convert RMVB to FLV, RMVB to SWF, AVI to SWF/FLV, DVD to SWF/FLV, MOV to SWF/FLV, WMV to SWF/FLV, MP4 to SWF/FLV, 3GP to SWF/FLV, MPEG to SWF/FLV, etc.
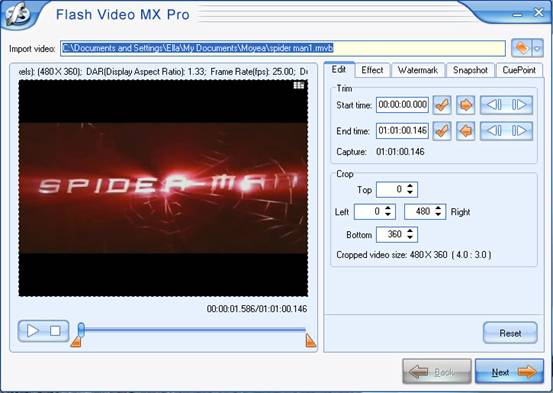
So you can choose to import any video to it as you like. In the below step, you can even customize your original video by adding watermark, subtitle, special effect, trim and crop it to meet your special needs. Moreover, it allows you to add Cue Point, which provides the option to trigger event. It can show your ideas in the preset time when you want the event to happen.
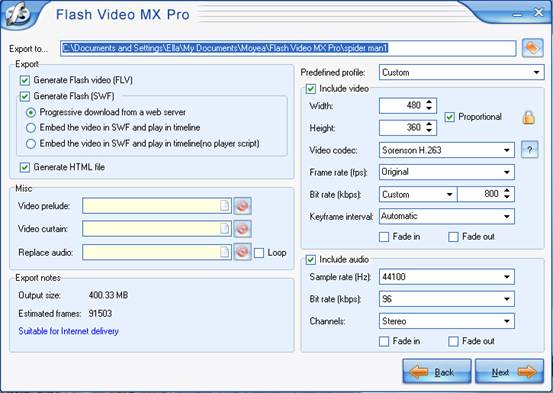
Step2. Do settings.
Click button Next, the below interface will come to your eyes. Here, you can adjust the setting by your needs. You can check the options to generate Flash (SWF), FLV, HTML file, and JPG file, just see the options below. Apart from that, you can even add other video at the beginning and end of your original video, including replace the original audio with others you like. You can set it in the Misc section. All these settings will make your video distinguished.
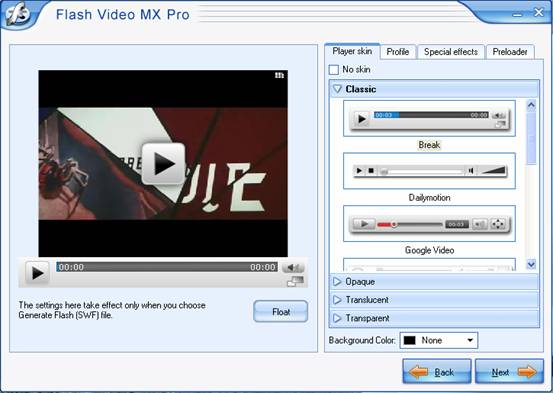
Step3. Add special effect and choose player skins.
In this step, you can choose the best one in your mind from the various player skins, preloaders and special effects. All of these choices will make your video different from others, so as to make your presentation video more suitable to your demand.
Step4. Conversion
This is the last step. After you check all the settings, you can start your conversion. Just click the button Start. The output file will pop up to you after the conversion is finished, then you will get the stunning video you want. Enjoy it.