Flash Video MX series are very useful programs which help encode FLV files for uploading online, while FLV Editor Lite/ Ultimate are helpful to edit FLV files for sharing online. How can you make good use of the two series? This article is to tell you the way to resize FLV with Flash Video MX Pro, and edit with the free FLV Editor Lite.
Resize video.
With the help of Flash Video MX Pro and FLV Editor Lite/ Ultimate, you can encode and edit any popular videos to FLV and upload online.
The FLV Editor Lite/ Ultimate simply join FLV files without setting the video size, so if the size of videos you’d like to merge are different, you can resize them in a same size by cropping or setting values in Flash Video MX Pro. For multiple files, you can use the Batch Encoder.
Just import the multiple files and then customize the settings one by one, and encode in batch.
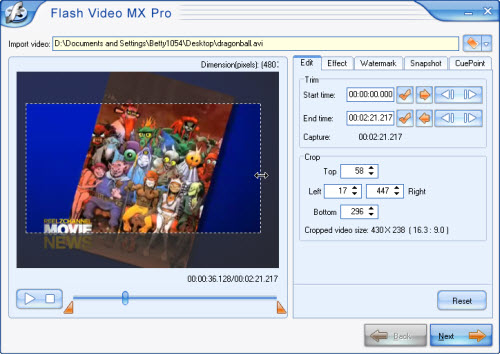
You have three ways to resize the video dimension.
1. Crop the video by dragging the edge. You can see the value changing in Crop section on the right.
2. Or you can set the exact value in Crop section.
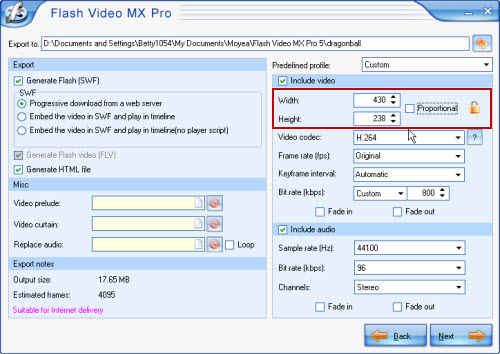
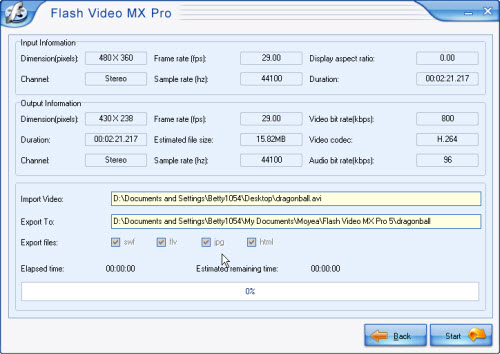
3. Otherwise, you can go to the export settings section, and change values in Width and Height box. If checking Proportional box, the value will be changed according to the aspect ratio.
In Export settings section, you can select the output format. If you’d like to upload the generated file directly to your website, you can check “Generate Flash (SWF)”. Clicking “Next”, you can go to the section to select player skins, preloaders, and special effects.
If you’d like to edit with FLV Editor Lite/ Ultimate, you can uncheck “Generate Flash (SWF)”. And clicking “Next”, you can go to the following section for review detail information. Clicking “Start”, you can start encoding. Clicking “Back”, you can reset.
After the encoding, you can import the FLV file to FLV Editor Lite/ Ultimate for editing.
Edit FLV with FLV Editor Lite/ Ultimate.
With FLV Editor Lite/ Ultimate, you can merge FLV, trim FLV, cut FLV, add metadata and cue point to the FLV, or replace the audio. The Lite version is with few limitations, while the Ultimate version is the retail version with no limitations and with more powerful functions like project saving and more preloaders, player skins, and special effects.
Edit FLV
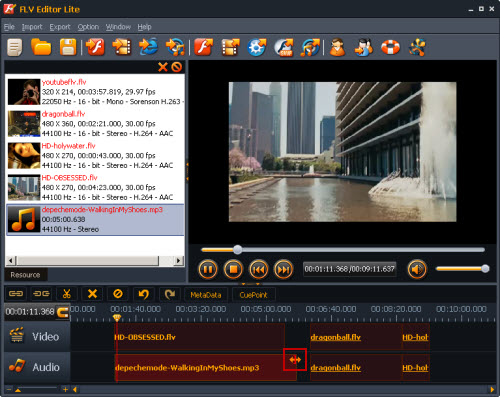
You can import FLV by clicking the buttons on Toolbar. You have several options to choose, from your computer, from Media Library of YouTube FLV Downloader, or from IE Cache. You can also import MP3. For Lite version, only 5 files can be imported in which only one MP3 can be imported. The imported files will be placed in Resource List. You can double click on file to play. To edit the file, you can drag it the Timeline.
Real-time preview: You can real-time preview the clips on Timeline by clicking Play button on Preview Pane.
Replace audio: You can rip the video and audio of a selected clip by clicking Unlink button. Select and delete the audio. And then input an MP3 or FLV audio. Selecting them with the help of Ctrl on your Keyboard, you can click Link button to link. Thus you can attach and move them together.
Trim FLV/F4V/MP3 length: If the video or audio length does not fit your needs, you can drag the edge to trim the clip. For blank area on Timeline, you can right click on the blank and select Trim Blank.
Cut FLV: This program enables you to cut and edit clips freely on Timeline. You can drag the pointer to the right position and click the Scissors button to cut. And then, you can rearrange the order, or delete the unwanted parts without difficulties.
Short-cut keys: You can edit with short-cut keys with this program which make your editing process on Timeline more precise.
Ctrl + A to select all;
Ctrl + Z to undo or redo;
Ctrl + left/right to move the clip;
Ctrl + click on clip to select or deselect multiple clips on Timeline. And then you can move them together.
Delete: Press Delete key on keyboard, and you can delete the selected clip or clips on Timeline.
Export SWF for uploading online.
After all settings, you can click Export SWF button, and then you can get files suitable for online delivering.

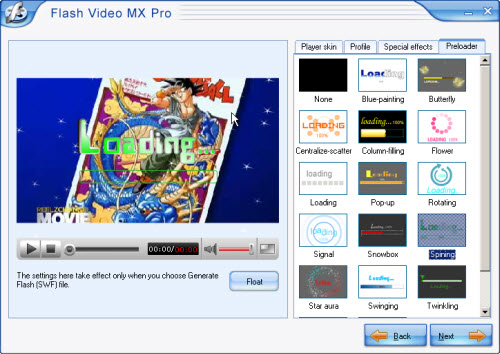
You can select player skins, preloaders, and special effects. And also you can set profile for the player.
At last, upload all files to the same folder of your server and you can get your video online.