If you are running a website or having a blog to update, you may find video contents your best choice to make the page more attractive. You will also find it necessary to add watermarks as decoration or copyright. You may also be interested in add subtitles to your video. Other than that, you may find the videos more vivid and interesting after implement your creative ideas. This article is to tell you how to add watermarks and subtitles to your video, edit the video with your brilliant ideas, and upload to your website or blog.
The useful tools we are using here:
Flash Video MX Pro/ Std
FLV Editor Lite/ Ultimate
Add watermark and subtitle to the video.
With Flash Video MX Pro/ Std, you can make it without any difficulties.

To add image watermark, you can click the “+” button and select Add image. And then you can select an image as the watermark. In Option section, you can click the wrench button to select a transparent color or set Alpha, and choose an Origin to place the image. In Time offset section, you can set the start time and end time to show the image. If you want to have the image fade in or out, you can set the values in relative blanks. If you don’t like fade in or out effect, you can set the value as 0.
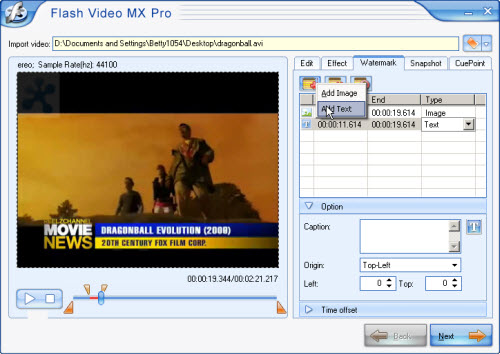
To add subtitles is also easy with this program. Just click “+” button under watermark tab and select Add text. And then you can type in words in Caption box and select origin. You can also set the start time, end time, and fade in or out in Time offset section. If you have other things to do while setting, you can save project file by clicking the button on top-left of this program and select Save or Save as to save project file for future editing.
Please note, you can either set the start time and end time by dragging the bar, or set the value in Time offset section. If you have set start time and end time in Time offset section, you must press Enter on your keyboard, or click Mark current as time to confirm.
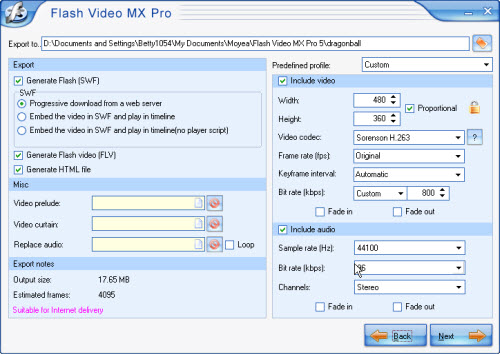
After the settings, you can keep on clicking next and start to encode the FLV. And then, you can import the FLV into FLV Editor Lite/ Ultimate to edit.
With the buttons on Toolbar and main menu, you can easily import and export FLV/ SWF/ MP3. You can import multiple FLV, F4V, and MP3 files to Timeline. For Lite version, only 5 files in which only one MP3 file can be imported. The Ultimate version is without this limitation.
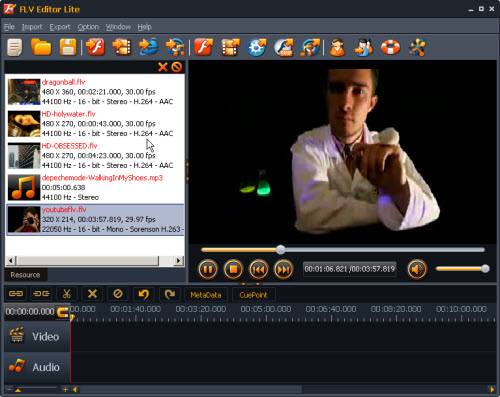
Once the files are imported, they will be placed in Resource List, you can double click to play.
To edit the clips, you can drag them one by one to Timeline. Please note, no matter how many clips you have placed on Timeline, they will be output as a single file. While editing, you can real-time preview the effect by clicking Play button on Preview Pane.
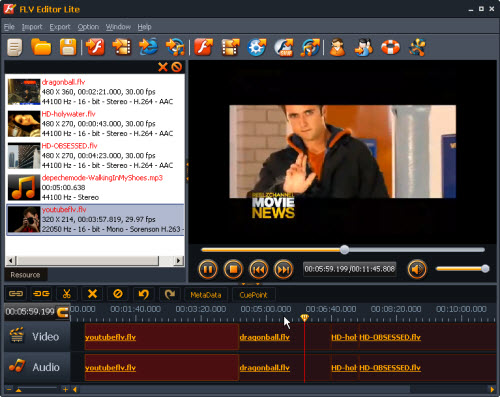
Merge FLV: You can import and merge files without difficulties with the Timeline. It helps a lot to increase your editing speed. If you don’t like the blank areas among the clips, you can right click on Timeline and select Trim Blank.
Cut FLV: If you are not satisfied with some part of a clip, you can drag the pointer to the right position and click Scissors button to cut.
Replace audio: This program makes it so easy to rip FLV/ F4V video and audio. You can select a clip, and click the Unlink button to rip the video and audio, delete the unwanted part, and input a desired FLV audio or MP3 instead. To join them together, you can select the desired video and audio with the help of Ctrl, and click Link. And then you can move them together.
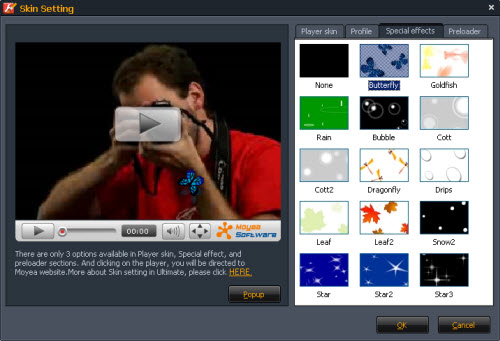
Export SWF with more special effects: If you’d like to upload the edited FLV to your website or blog, you can select Export SWF. You can choose Player skins, special effects, and preloaders. And you can even set Profile for the player.
At last just upload all the FLV, SWF, HTML, and JPEG under a same folder.
Very easy right? Hope you enjoy your time with the two programs.