Have you ever downloaded the favorite flash video (FLV) from YouTube or other video-sharing web sites? Does an idea get you that adding the watermark for FLV? A watermark can tell your videos different from others or highlight your video style if you want share with others on YouTube or your portable devices.
No matter what watermark, image watermark or text watermark, it will be a good way to personalize or mark your FLV files. For some companies, adding logo or brand name will protect their copyright, and for the individuals, adding the favorite image or text to create FLV files of your own.
In general, downloaded videos from YouTube are flash videos (FLV). If you want to re-upload the edited FLV files into YouTube to share or transfer to your portable devices, you need FLV conversion tool. Some converters just contain the conversion function, but today the tutorial will introduce an FLV conversion tool including conversion and watermark adding.
Moyea FLV to Video Converter is to convert FLV to other formats like FLV to AVI, FLV to MPEG, FLV to MP4, FLV to MOV, FLV to 3GP, etc. It allows you to add the watermark to the output video, including text or image. Multiple formats are supported such as *.bmp, *.jpeg, *.gif, *.tiff, *.png.
How to add image as the watermark:
Download, install and launch the program and click on the button
![]() to add FLV files into the file list. Select the FLV file from the list.
to add FLV files into the file list. Select the FLV file from the list.
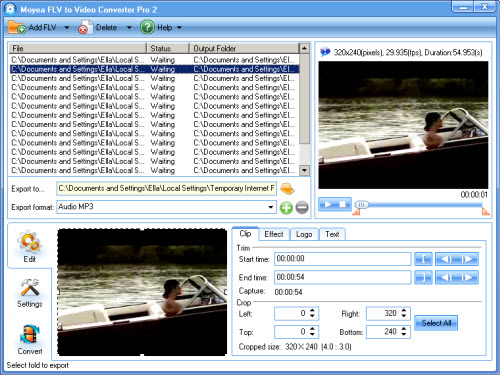
At the right-bottom corner, you can see the watermark adding region. Check the box "Add image watermark"
You need three steps to complete it:
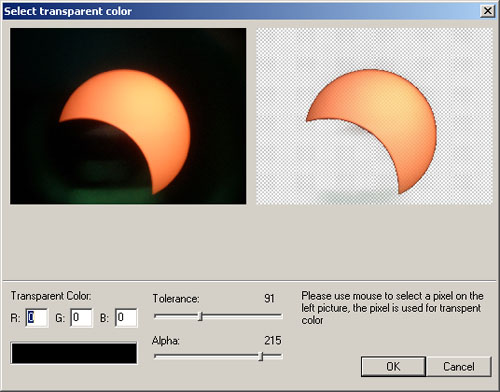
1. Click folder icon to input the image watermark.2. Click the triangle button to choose "Select" to pop up a window to configure the transparency.
By dragging the slide bar to adjust the tolerance and Alpha channel for the transparency effects. What's more, you can type the value to set the transparency color, R: red, G: green, B: blue.
Set the position for the watermark.
Specify the logo position by "Origin" and you can type or select the value from the box in "Offset" to make the exact position. Then click "OK" it will be done.
Here you can see the video containing the watermark you set.
How to add text watermark:
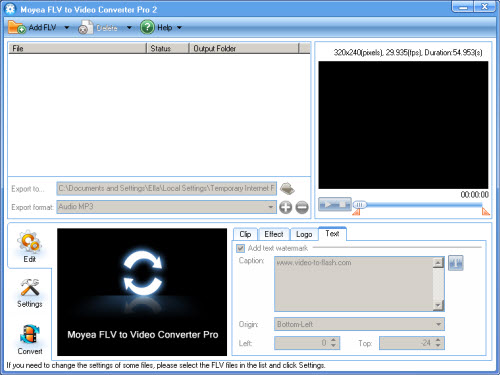
Click "Text" to go into the text watermark editing region. The editing process begins with checking "Add text" box.
1. Type the text you want as the logo content in "Caption" blank.
2. Configure the settings for the text content.
Besides the settings like font, style, size, you can also configure Alpha channel to make the transparency effects. What's more, two effects and the sample preview panel are provided here. Click "OK" to continue.
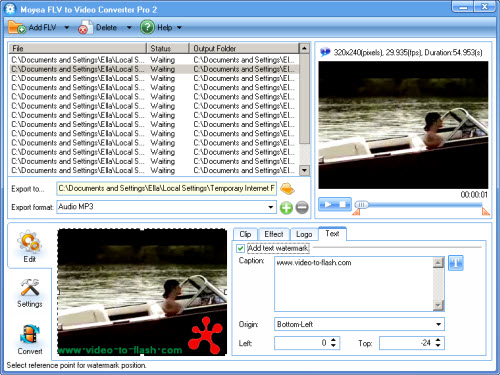
Specify the text watermark position.
Select the text logo direction from Origin pull-down menu, and then adjust Offset to make the exact position. Here it is ready for you to enjoy the own video with your mark.
If you are not satisfied with the brightness, contrast or the volume, please click "Adjust" tab to modify.
How to convert FLV into other formats:
After importing FLV files into the file list of the program, specify the location of the converted files by clicking folder icon. The Crop function helps you cut the black edges. The settings tab allows you to select the output file type like AVI, MPEG, MP4, MOV, etc and some video/audio settings. At last click "Convert" to start conversion.
Here the conversion and the watermark adding task are completed. You can find the output files through the output path you set. It is ready for you to re-upload YouTube or transfer into your portable devices to share.